
Cleaning dust from your keyboard can seem like a daunting task, but with just a few steps, you can quickly and easily get your keyboard spotless. Whether you’re a hardcore gamer, an office worker, or a student, having a clean keyboard can be beneficial for your health and productivity. With the right cleaning techniques, you can make sure your keyboard is free of dust, dirt, and oils. No matter the brand, size, or type of keyboard, you can get it looking like new in no time. Follow these easy steps and you’ll be keyboard dust-free in no time!

What items do I need to clean my keyboard?
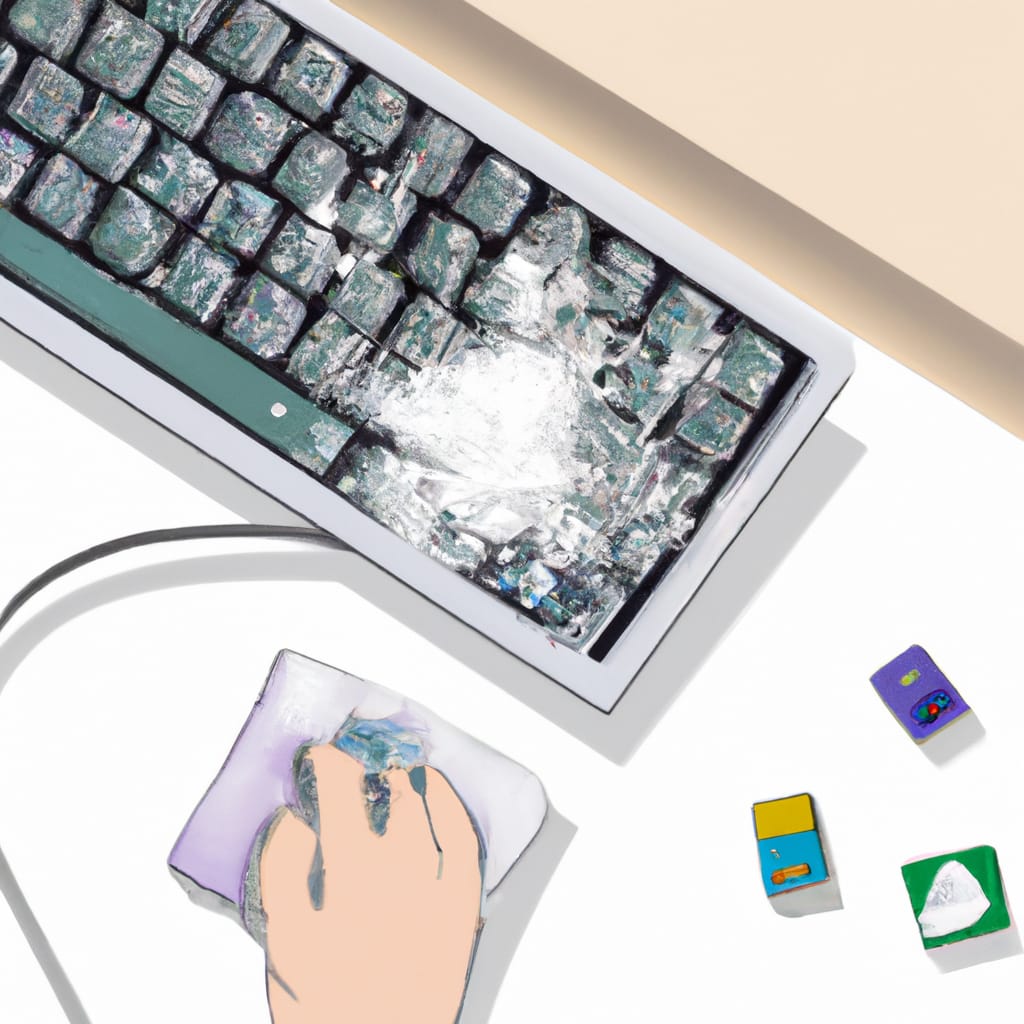
If you want to know how to clean dust from your keyboard, the process is fairly simple. Here is a list of items you’ll need to get started:
- Soft bristle toothbrush or paint brush
- Cotton swabs
- Compressed air
- Vacuum cleaner with soft brush attachment
- Microfiber cloth
- Rubbing alcohol
- Mild soap or liquid dishwashing detergent
Before you start cleaning your keyboard, turn off your computer and unplug the keyboard from the computer. Then, use the compressed air to blow away any loose dust and debris. You can also use a vacuum cleaner with a soft brush attachment. Make sure to go lightly and not press too hard on the delicate keys.
Once you’ve removed the bulk of the dust and debris, you can use a soft bristle toothbrush or paint brush to gently brush away any stubborn particles. Then, use a cotton swab to get into the crevices and clean out any hard-to-reach areas.
Once the dust has been removed, you can use a microfiber cloth and a small amount of rubbing alcohol to wipe down the surface of the keys. This will help to remove any oily residue and make them look like new. If you need to use a mild soap or liquid dishwashing detergent, make sure to rinse the keys thoroughly and dry them off with a cloth before using.
Now that you know how to clean dust from your keyboard, you can keep it clean and free of debris. This will help prolong the life
How do I prepare my keyboard for cleaning?
Preparing a keyboard for cleaning is an important step to ensure that the cleaning process is effective and safe for the keyboard. Here are some tips to help prepare your keyboard for cleaning:
- Turn off the keyboard and disconnect it from any power or peripheral devices.
- Gently shake the keyboard over a trash can to remove any loose particles or debris.
- Using compressed air, blow away any remaining dust or particles. Be sure to blow in the direction of the keys.
- Wipe away any remaining particles with a damp cloth.
- Use a cotton swab dipped in isopropyl alcohol to clean between the keys.
- To clean the keys, use a lightly dampened cloth. Be sure to wring out the cloth so it is not dripping wet.
Once the keyboard has been prepared for cleaning, it is important to be mindful of the materials being used to clean the keyboard. Avoid using harsh chemicals or abrasive materials, as these can damage the keyboard. Make sure to keep the keyboard dry and do not allow any liquids to enter the electronics.
By following these steps, you can effectively and safely prepare your keyboard for cleaning. This will help ensure that the cleaning process is effective and that your keyboard remains in good condition.
How do I safely remove the keycaps?
Cleaning dust from a keyboard is an important part of regular maintenance for any computer user. The process of removing keycaps from a keyboard can be tricky and should be done with care. Here are the steps to safely remove keycaps from your keyboard:
- Use a keycap puller to gently lift the keycaps off the keyboard. Keycap pullers are inexpensive and can be found online or at most computer stores.
- Before taking off the keycap, make sure you are aware of the correct orientation of the keycap. If you are unsure, consult your keyboard’s manual.
- Gently pull the keycaps off the keyboard. Start at the top left and move your way across the keyboard. Be careful to not pull too hard, as keycaps can be damaged if pulled with too much force.
- Once the keycaps have been removed, use a soft cloth and mild cleaning solution to clean the dust off the keys.
- Dry the keys with a soft cloth and make sure no liquid gets into the keyboard.
- Replace the keycaps and make sure they are secure before using the keyboard.
By following these steps, you can safely and effectively remove the keycaps from your keyboard and keep it clean and dust-free.
How do I clean between the keys?
Cleaning dust from a keyboard can be a tedious task, but it is important to keep your keyboard clean and free from any dirt or debris that can accumulate over time. Here are some tips to help you get started:
- Turn off the power to your keyboard. Unplug the keyboard from the computer.
- Using a can of compressed air, blow out any dust or dirt that has built up in and around the keys.
- To clean between the keys, dip a cotton swab in rubbing alcohol and gently dab the swab between each key, using a circular motion. Do not push too hard, as this may cause damage to the keys.
- Remove any debris or dirt that has been loosened by the rubbing alcohol with a lint-free cloth.
- Allow the keyboard to air dry completely before plugging it back into the computer.
Keeping your keyboard clean is important, as dirt and dust can build up over time and can potentially cause damage to the keys and circuitry. Following these steps regularly will ensure your keyboard stays in good condition and works properly.
What is the best way to clean the surface of the keyboard?
Cleaning dust from your keyboard is an important part of keeping your computer in its best shape. Here’s a simple guide to help you get started:
1. Unplug the keyboard from the computer.
2. Use a can of compressed air to blow off the dust from the keyboard and between the keys.
3. Wipe down the keyboard with a cloth dampened with a mild soap and warm water. Use a cotton swab for hard-to-reach places. Avoid getting the cloth or swab too wet.
4. Dry the keyboard with a clean cloth and then use a vacuum cleaner to remove any remaining dust particles.
5. Use a dry toothbrush or a small brush to remove any debris from between the keys.
6. To remove stubborn stains, mix a few drops of isopropyl alcohol with a few drops of water. Use a cotton swab dipped in the solution to gently scrub the stained area.
By following these simple steps, you can keep your keyboard looking and functioning like new. With regular cleaning, your keyboard will stay in top condition for years to come.
How do I clean the keycaps?
Cleaning the keycaps on a keyboard is an important task to maintain the look and feel of your keyboard. Here are some tips on how to clean dust from keyboard keycaps:
- Start with a can of compressed air. This is the safest and most effective way of cleaning dust from keyboard keycaps. Aim the spray nozzle at the keycaps and blow away the dust and debris. Make sure to use the air in short bursts to avoid damaging the keycaps.
- Once the dust has been blown away, use a soft cloth to wipe away any remaining dirt or debris. Avoid using harsh cleaning chemicals as they can damage the keycaps.
- If the dirt is still persistent, use a cotton swab dipped in a mild detergent solution. Make sure to rinse the swab after each use to avoid transferring debris from one keycap to another.
- To clean the crevices between the keys, use a small brush. Make sure to use a brush with soft bristles to avoid damaging the keycaps.
- Once you’ve finished cleaning, use a dry cloth to wipe away any remaining moisture. This will ensure that no liquid is left behind on the keycaps.
Following these steps will help keep your keyboard looking and feeling like new. Regular cleaning will ensure that your keyboard remains dust-free and in good working condition.
How do I put the keycaps back on the keyboard?
How to Put Keycaps Back on the Keyboard:
Putting keycaps back on the keyboard is a relatively simple process, but it is important to do it properly to avoid damaging the keyboard. Here’s how to do it:
- Start by finding the keycap that you wish to replace. Look for any clips on the bottom of the keycap that might be used to hold it in place.
- Once you have identified the keycap, gently lift it off the keyboard. It may help to use a flathead screwdriver if the keycap is difficult to remove.
- Once the keycap is removed, clean the area of any dust or debris. You can use a can of compressed air or a vacuum cleaner to do this.
- Now, place the keycap back on the keyboard. Make sure that the clips on the bottom of the keycap are properly aligned with the slots on the keyboard.
- Press the keycap firmly into place. You may need to use a flathead screwdriver to help press the keycap into place.
- Once the keycap is in place, make sure that it is secure and not loose. If it is loose, then you may need to press it down further or use a flathead screwdriver to help secure it.
That’s it! With a bit of patience and attention to detail, you should now have successfully put the keycap back on the keyboard. Make sure to repeat this process for any other keycaps that need to be replaced.
How do I clean the scissor switches on the keyboard?
Keyboards, particularly laptop keyboards, accumulate dust, dirt, and crumbs over time. If not regularly cleaned, these particles can cause your keys to stick and your keyboard to become unresponsive. To help keep your keyboard in good working order, here’s how to clean the scissor switches on your keyboard:
- Disconnect your keyboard. Make sure that it is turned off and that it’s disconnected from any power source.
- Use a soft cloth to wipe away any visible dirt, dust, and crumbs.
- Gently press down on each key to remove any dust or debris that may be stuck underneath.
- Use a can of compressed air to blow out any remaining dust from the keyboard. Make sure to hold the can straight and at a distance of about 10 inches away from the keyboard.
- Use a cotton swab and isopropyl alcohol to clean the scissor switches on the keyboard. Dip the swab in the alcohol and clean the switches by gently pressing down and scrubbing back and forth in a circular motion.
- Let the keyboard air dry or use a cloth to dry any remaining moisture.
- Reconnect the keyboard and turn it on to test if it is clean and working properly.
Cleaning the scissor switches of your keyboard is a simple and easy process that can be done in a few minutes. With regular cleaning, you can help keep your keyboard in good working order and keep it free from dust and dirt.
How do I clean the rest of the keyboard body?
Cleaning dust from the keyboard body is a simple process that requires only a few items. Here are the steps:
- Turn off your computer and disconnect the keyboard.
- Use a vacuum cleaner with a soft brush attachment to remove any debris from the keys and body of the keyboard.
- Mix a solution of mild detergent and warm water. Dip a soft cloth into the solution and wring it out thoroughly.
- Wipe down the body of the keyboard with the damp cloth.
- Repeat the process if needed to remove any stubborn dirt.
- Dry the keyboard with a clean, dry cloth.
- Reconnect the keyboard to the computer.
Cleaning dust from the keyboard body is an easy task that will help keep your keyboard looking and functioning properly. By following the above steps, you can ensure that your keyboard is clean and free of debris.


